Mycelarium Controls Guide: How to Grow, Shoot, and Manage Your Mycelium
If you have started playing the Mycelarium demo and found yourself asking how the controls actually work, you are not alone.
If you have started playing the Mycelarium demo and found yourself asking how the controls actually work, you are not alone. The game drops you into the soil as a tiny mushroom with almost no explanation, expecting you to figure out the rest by experimenting. This guide breaks down the mechanics shown in the demo so you can stop guessing and start expanding efficiently.
Core Controls and Basic Interaction
The control scheme is built around a single idea: you are a hypha, and every action extends your network.
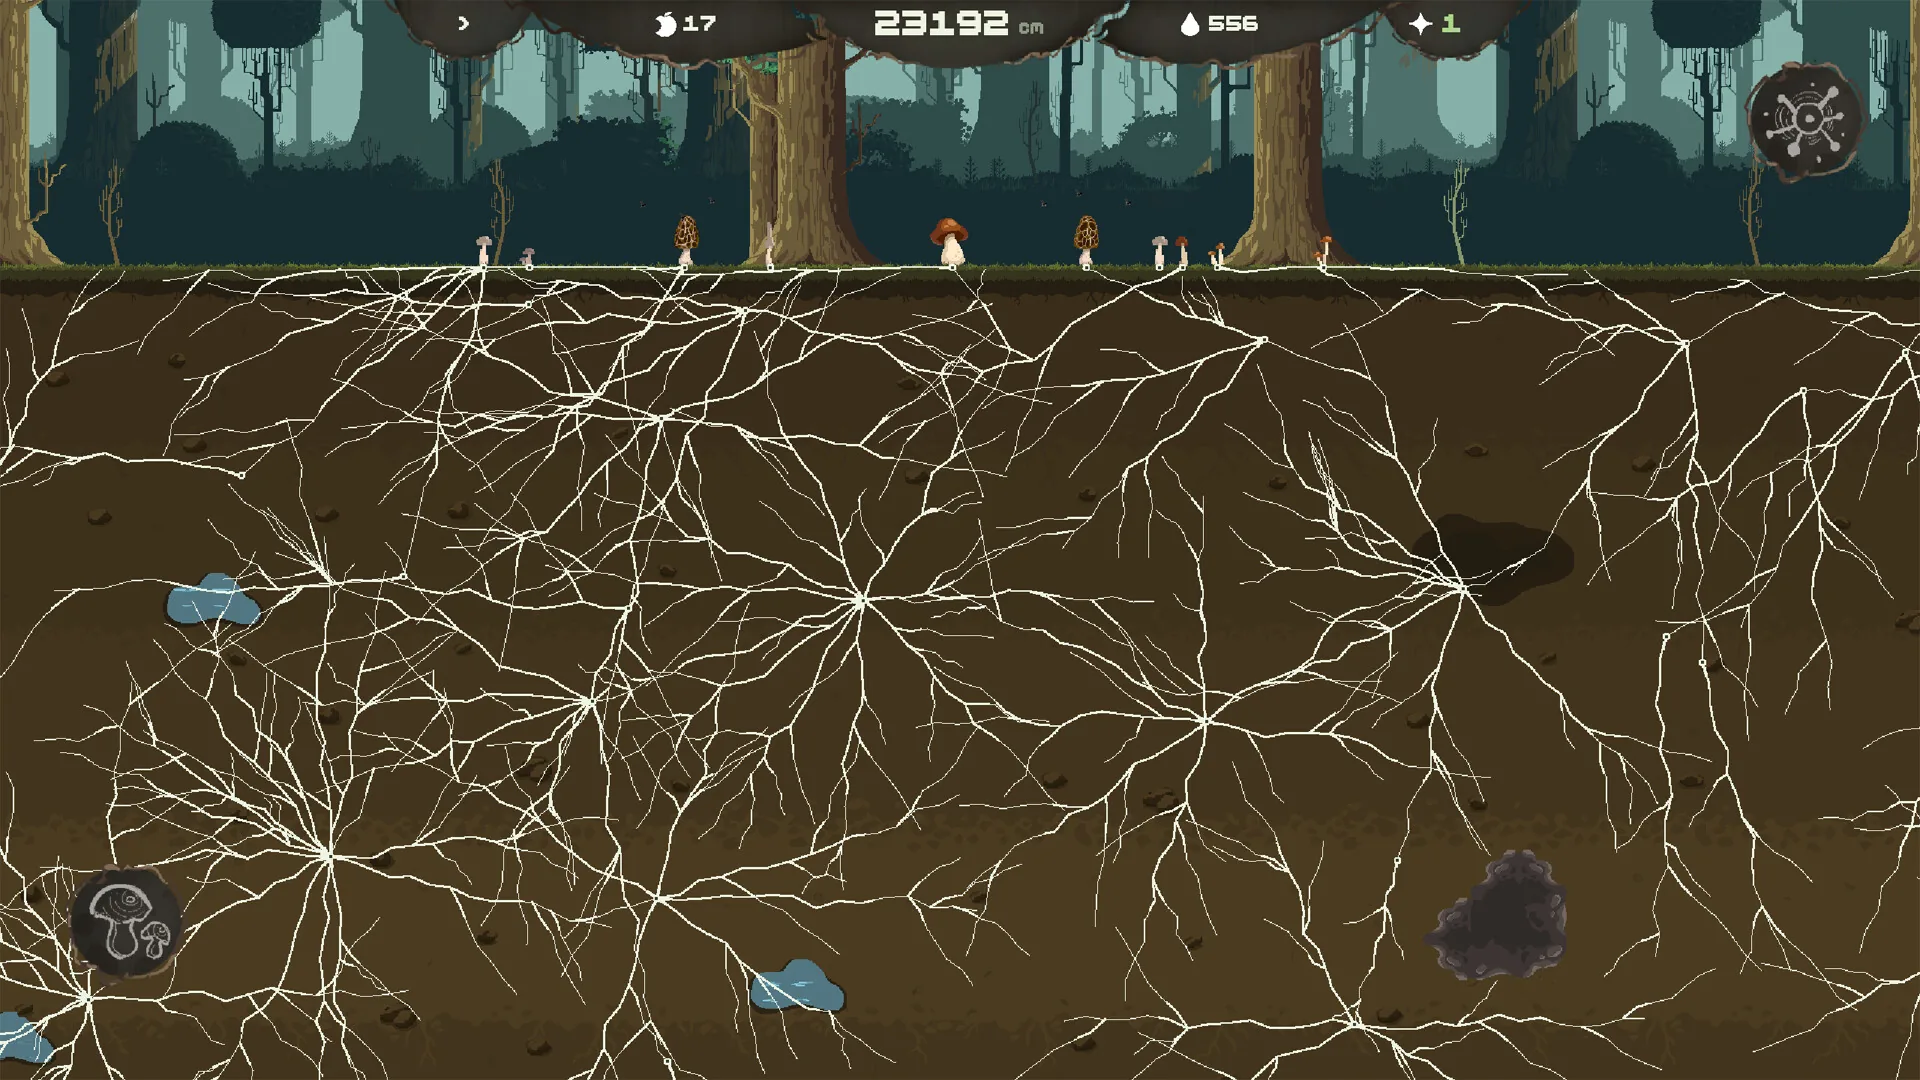
Selecting and building. You begin attached to a starting mushroom. To grow, choose a hypha branch and click anywhere along it to place a node. That node becomes a new firing point. Once a node exists, you can shoot from it directly, paying the resource cost each time.
Firing shots. After selecting a hypha, you aim and fire a new hypha shot outward. The shot travels a fixed distance determined by your current range upgrade. If it lands on a resource or open soil, you can continue from there. The key detail from the demo is that you are not limited to firing only from the original mushroom—any node you have already placed can serve as a launch point.
Multitasking paths. You do not have to fire in straight lines toward one target. The demo shows players arcing shots so they pass through a water pool, graze a salt deposit, and exit the other side. Because a single shot can cross multiple tiles, planning the angle of your shot is often more valuable than simply firing at the nearest resource.
Resource Management
Three resources drive everything you do, and confusing their roles is the fastest way to stall out.
Water
Water is your movement currency. Every hypha shot costs water, and if you run dry, you cannot expand until you drink again. Two rules matter here:
- Each water source pays out once. Re-firing over the same pool does not generate extra water. Once you have absorbed a pool, it is spent.
- Rain suspends the cost. During rain, shots do not consume water. If you see weather rolling in, save up your planned expansions and fire freely while it lasts.
Because water is consumed by every action, the demo strongly rewards routing shots through water tiles on the way to somewhere else rather than treating hydration as a separate errand.
Salt
Salt is your construction material. Eating salt lets you build nodes and mushrooms. In practice, this means salt deposits are the gating resource for structural growth. If you find yourself unable to place nodes even though you have water, check your salt reserves.
Food
Food is the high-tier currency. Building a mushroom costs 20 food, so you cannot afford surface structures until your network is mature enough to generate a surplus. Food comes from two sources shown in the demo:
- Predator mushrooms catch and eat flies.
- Decomposer mushrooms reach out to fallen leaves and break them down.
Once those mushrooms are online, food generation scales with how much surface area your network covers, which creates the demo's core feedback loop: more growth produces more food, which funds more mushrooms, which produces more food.
The Shot Mechanic and Node Placement
Understanding how shots resolve is the difference between slow expansion and runaway growth.
Range determines reach. Your base shot distance is short. The first upgrade most players should prioritize is mycelia range, because every increase lets you touch tiles you previously could not reach without spending intermediate nodes.
Free node buds. Some shots have a chance to sprout a free node at the tip. The demo suggests the odds are low—possibly around five to ten percent—but the effect compounds. If you are firing repeatedly anyway, every free node is a launch point you did not have to pay salt for. Upgrades that increase this chance are worth taking once your basic economy is stable.
Revisiting territory. Because you can fire from any node you have already placed, you are never locked out of a region you have passed through. If you spot a resource you missed earlier, you do not need to rebuild a path to it. Find the nearest existing node, spend the water, and reach it directly.
Mushrooms and Surface Structures
Mushrooms are the visible payoff of your underground work, but they have specific placement rules.
Surface requirement. You can only build mushrooms where your network is close enough to the surface. If a mushroom option is greyed out, the issue is not food—it is that your hyphae have not reached a shallow enough tile in that area.
Predator mushrooms. These trap flies and convert them into food. In the demo, the player builds a predator mushroom specifically to escape a food deficit and move into surplus. If you are hovering near zero food and cannot afford upgrades, a predator mushroom is usually the correct next purchase.
Decomposer mushrooms. These target fallen leaves. They are less immediately dramatic than predator mushrooms but contribute steady food income once your network spreads under leaf litter.
Hedgehog interference. Hedgehogs wander the map and will steal mushrooms. The demo shows them taking one mushroom at a time, and the player eventually wishes for a mushroom that poisons them. There is no confirmed counter to this in the demo beyond rebuilding, but knowing that theft is limited to one mushroom per visit helps you avoid over-investing in a single exposed tile.
Upgrade Priorities and the Tech Tree
The demo touches on a larger tech tree without fully revealing it, but the upgrades shown fall into three practical buckets.
Range first. Early on, every point of shot range reduces the number of nodes you need to bridge gaps. This saves salt and lets you claim distant water before competitors or random events interfere.
Budding chance second. Once you can fire shots without bankrupting your water supply, increasing the free-node bud chance turns every shot into a potential expansion. The demo player spams shots specifically to proc these buds, treating volume as a strategy.
Food generation third. Predator and decomposer mushrooms should come online before you start spending heavily on expensive surface projects, because the 20-food cost per mushroom will otherwise trap you in a deficit.
Practical Tips from the Demo
- Route, don't commute. Before firing, look at what the shot will cross. A path through water and salt is worth more than a direct line to either one.
- Respect the one-time water rule. Do not waste shots re-harvesting spent pools. Mark them mentally and move on.
- Use rain aggressively. When rain starts, fire every expansion you have been saving. It is the only time growth is free.
- Build a predator mushroom early. The demo shows a clear inflection point where food flips from scarce to surplus after the first predator mushroom goes up.
- Expand in multiple directions. The demo player repeatedly notes that spreading outward in several directions at once generates more total progress than pushing hard down one corridor, because resources are scattered rather than linear.
What the Demo Leaves Open
The demo is explicitly unfinished, and a few things remain unverified for the full release. There appears to be a broader tech tree beyond what is shown, but the full list of upgrades and their costs are not visible in demo play. The game also lacks a hard fail state or explicit objective in the demo—the player describes the experience as chill and open-ended, with growth itself serving as the goal. Whether the full version adds structured objectives, additional maps, or survival pressure is unknown from the demo alone.
If you want to confirm details for your current version, the most reliable method is to open the in-game upgrade or tech panel and hover over each entry, since the demo does not expose these numbers in a single menu. Watching a current playthrough can also help, though the demo may differ from the released build.
Bottom Line
Mycelarium controls are simple on the surface—click to build, click to fire, manage three resources—but the depth comes from pathing and economy. Water gates your movement, salt gates your construction, and food gates your mushrooms. Prioritize range, route shots through multiple resources, capitalize on rain, and get a predator mushroom online as soon as you can afford it. Do that, and the rest of the map tends to open up on its own.